快速开始
- 1: IHPA (Intelligent HPA)
- 1.1: 使用定时扩缩容
- 1.2: 使用响应式扩缩容
- 1.3: 使用预测式扩缩容
- 1.4: 使用多阶段灰度扩缩容
1 - IHPA (Intelligent HPA)
IHPA (Intelligent HPA) 是一个更加智能化的、具备完善技术风险能力的且高度可扩展定制的 HPA 替代方案。
你可以跟随下面的指南来快速尝试 IHPA 的一些核心功能。
1.1 - 使用定时扩缩容
准备开始
你需要拥有一个安装了 Kapacity 的 Kubernetes 集群。
运行示例工作负载
下载 nginx-statefulset.yaml 文件,并执行以下命令以运行一个 NGINX 服务:
kubectl apply -f nginx-statefulset.yaml
验证服务部署完成:
kubectl get po
NAME      READY   STATUS    RESTARTS   AGE
nginx-0   1/1     Running   0          5s
创建配置了定时画像源的 IHPA
下载 cron-portrait-sample.yaml 文件,其内容如下所示:
apiVersion: autoscaling.kapacitystack.io/v1alpha1
kind: IntelligentHorizontalPodAutoscaler
metadata:
  name: cron-portrait-sample
spec:
  scaleTargetRef:
    apiVersion: apps/v1
    kind: StatefulSet
    name: nginx
  minReplicas: 1
  maxReplicas: 10
  portraitProviders:
  - type: Cron
    priority: 1
    cron:
      crons:
      - name: cron-1
        start: 0 * * * *
        end: 10 * * * *
        replicas: 1
      - name: cron-2
        start: 10 * * * *
        end: 20 * * * *
        replicas: 2
      - name: cron-3
        start: 20 * * * *
        end: 30 * * * *
        replicas: 3
      - name: cron-4
        start: 30 * * * *
        end: 40 * * * *
        replicas: 4
      - name: cron-5
        start: 40 * * * *
        end: 50 * * * *
        replicas: 5
执行以下命令创建该 IHPA:
kubectl apply -f cron-portrait-sample.yaml
验证结果
通过查看 IHPA 的事件可以看到工作负载的副本数正按我们的配置进行动态调整:
kubectl describe ihpa cron-portrait-sample
...
Events:
  Type     Reason                Age                From             Message
  ----     ------                ----               ----             -------
  Normal   CreateReplicaProfile  38m                ihpa_controller  create ReplicaProfile with onlineReplcas: 3, cutoffReplicas: 0, standbyReplicas: 0
  Normal   UpdateReplicaProfile  33m (x2 over 33m)  ihpa_controller  update ReplicaProfile with onlineReplcas: 3 -> 4, cutoffReplicas: 0 -> 0, standbyReplicas: 0 -> 0
  Normal   UpdateReplicaProfile  23m                ihpa_controller  update ReplicaProfile with onlineReplcas: 4 -> 5, cutoffReplicas: 0 -> 0, standbyReplicas: 0 -> 0
  Warning  NoValidPortraitValue  13m                ihpa_controller  no valid portrait value for now
  Normal   UpdateReplicaProfile  3m15s              ihpa_controller  update ReplicaProfile with onlineReplcas: 5 -> 1, cutoffReplicas: 0 -> 0, standbyReplicas: 0 -> 0
你也可以通过直接观察工作负载的副本数变化来验证。
说明
可以看到,由于上面的 cron 表达式没有覆盖所有时间段,因此在某段时间内出现了NoValidPortraitValue 事件,此时工作负载的副本数将保持不变。
清理资源
执行以下命令清理所有资源:
kubectl delete -f cron-portrait-sample.yaml
kubectl delete -f nginx-statefulset.yaml
1.2 - 使用响应式扩缩容
准备开始
你需要拥有一个安装了 Kapacity 与 Prometheus 的 Kubernetes 集群。
运行示例工作负载
下载 nginx-statefulset.yaml 文件,并执行以下命令以运行一个 NGINX 服务:
kubectl apply -f nginx-statefulset.yaml
验证服务部署完成:
kubectl get po
NAME      READY   STATUS    RESTARTS   AGE
nginx-0   1/1     Running   0          5s
创建配置了动态响应式画像源的 IHPA
下载 dynamic-reactive-portrait-sample.yaml 文件,其内容如下所示:
apiVersion: autoscaling.kapacitystack.io/v1alpha1
kind: IntelligentHorizontalPodAutoscaler
metadata:
  name: dynamic-reactive-portrait-sample
spec:
  scaleTargetRef:
    apiVersion: apps/v1
    kind: StatefulSet
    name: nginx
  minReplicas: 1
  maxReplicas: 10
  portraitProviders:
  - type: Dynamic
    priority: 1
    dynamic:
      portraitType: Reactive
      metrics:
      - type: Resource
        resource:
          name: cpu
          target:
            type: Utilization
            averageUtilization: 30
      algorithm:
        type: KubeHPA
执行以下命令创建该 IHPA:
kubectl apply -f dynamic-reactive-portrait-sample.yaml
增加负载
执行以下命令获取 NGINX 服务的 ClusterIP 和端口:
kubectl get svc nginx
NAME         TYPE        CLUSTER-IP     EXTERNAL-IP   PORT(S)    AGE
nginx        ClusterIP   10.111.21.74   <none>        80/TCP     13m
启动一个不同的 Pod 作为客户端,该 Pod 会不断地向 NGINX 服务发出请求,其中的服务地址和端口请替换为上一步中得到的值:
# 在单独的终端中运行它以便负载生成继续,你可以继续执行其余步骤
kubectl run -i --tty load-generator --rm --image=busybox --restart=Never -- /bin/sh -c "while sleep 0.01; do wget -q -O- http://<service-ip>:<service-port> > /dev/null; done"
等待几分钟后,可以通过 IHPA 的事件看到工作负载被扩容了:
kubectl describe ihpa dynamic-reactive-portrait-sample
...
Events:
  Type    Reason                Age    From             Message
  ----    ------                ----   ----             -------
  Normal  CreateReplicaProfile  6m58s  ihpa_controller  create ReplicaProfile with onlineReplcas: 1, cutoffReplicas: 0, standbyReplicas: 0
  Normal  UpdateReplicaProfile  3m45s  ihpa_controller  update ReplicaProfile with onlineReplcas: 1 -> 6, cutoffReplicas: 0 -> 0, standbyReplicas: 0 -> 0
停止产生负载
在我们创建 busybox 容器的终端中,输入 <Ctrl> + C 来终止负载的产生。
等待几分钟后,可以通过 IHPA 的事件看到工作负载被缩容了:
kubectl describe ihpa dynamic-reactive-portrait-sample
...
Events:
  Type    Reason                Age    From             Message
  ----    ------                ----   ----             -------
  Normal  CreateReplicaProfile  9m58s  ihpa_controller  create ReplicaProfile with onlineReplcas: 1, cutoffReplicas: 0, standbyReplicas: 0
  Normal  UpdateReplicaProfile  6m45s  ihpa_controller  update ReplicaProfile with onlineReplcas: 1 -> 6, cutoffReplicas: 0 -> 0, standbyReplicas: 0 -> 0
  Normal  UpdateReplicaProfile  3m15s  ihpa_controller  update ReplicaProfile with onlineReplcas: 6 -> 4, cutoffReplicas: 0 -> 0, standbyReplicas: 0 -> 0
  Normal  UpdateReplicaProfile  2m45s  ihpa_controller  update ReplicaProfile with onlineReplcas: 4 -> 1, cutoffReplicas: 0 -> 0, standbyReplicas: 0 -> 0
清理资源
执行以下命令清理所有资源:
kubectl delete -f dynamic-reactive-portrait-sample.yaml
kubectl delete -f nginx-statefulset.yaml
1.3 - 使用预测式扩缩容
准备开始
你需要拥有一个安装了 Kapacity 与 Prometheus 的 Kubernetes 集群。
请确保你的 Kubernetes 集群中有可用的 DNS(如 CoreDNS)来解析 Service 域名。如果没有,则需要对 Kapacity 做如下配置调整:
使用如下命令查看 Kapacity gRPC Server 的 ClusterIP 和端口:
kubectl get svc -n kapacity-system kapacity-grpc-service
NAME                    TYPE        CLUSTER-IP       EXTERNAL-IP   PORT(S)    AGE
kapacity-grpc-service   ClusterIP   192.168.38.172   <none>        9090/TCP   5m
使用如下命令更新 Kapacity 的配置,其中的 Kapacity gRPC Server 地址相关参数即为上一步查看到的值:
helm upgrade \
  kapacity-manager kapacity/kapacity-manager \
  --namespace kapacity-system \
  --reuse-values \
  --set algorithmJob.defaultMetricsServerAddr=<kapacity-grpc-server-clusterip>:<kapacity-grpc-server-port>
安装并配置 Ingress NGINX Controller
Kapacity IHPA 的预测式扩缩容使用「基于流量驱动的副本数预测」算法,因此我们需要至少一条流量指标来使用预测式扩缩容。这里我们使用 Ingress NGINX 作为工作负载入口流量的例子。
如果你的 Kubernetes 集群中还没有 Ingress NGINX Controller,请参考官方文档进行安装。
安装完成后,请按照此文档进行配置以确保 Prometheus 能够采集 Ingress NGINX 的指标。
配置 Kapacity 以识别 Ingress NGINX 指标
使用如下命令在 Kapacity 的自定义 Prometheus 指标配置中加入 Ingress NGINX 的指标:
kubectl edit cm -n kapacity-system kapacity-config
apiVersion: v1
data:
  prometheus-metrics-config.yaml: |
    resourceRules:
      ...
    # 在 rules 中加入 Ingress NGINX 的指标
    rules:
    - seriesQuery: '{__name__="nginx_ingress_controller_requests"}'
      metricsQuery: round(sum(irate(<<.Series>>{<<.LabelMatchers>>}[3m])) by (<<.GroupBy>>), 0.001)
      name:
        as: nginx_ingress_controller_requests_rate
      resources:
        template: <<.Resource>>
        # 注意:如果你的 Prometheus 是用 Prometheus Operator 安装的,请加上下面的 overrides 字段
        # overrides:
        #   exported_namespace:
        #     resource: namespace
    externalRules:
      ...
kind: ConfigMap
...
可以看到,该配置与 Prometheus Adapter 的配置完全兼容,更多背景信息可参考此用户指南。
随后,使用如下命令重启 Kapacity Manager 以加载最新配置:
kubectl rollout restart -n kapacity-system deploy/kapacity-manager
注意
Kapacity Manager 在启动完成后需要一定时间来同步 Prometheus 自定义指标配置,如果 Prometheus 内指标较多,可能会需要较长的时间(通常为分钟级)。可以通过检查 Kapacity Manager Pod 的标准输出日志中是否打出了metrics relisted successfully 来判断其是否已经完成同步。请在 Kapacity Manager 完成自定义指标同步后再进行后续的步骤。
运行示例工作负载
- 下载 nginx-statefulset.yaml 文件,并执行以下命令以运行一个 NGINX 服务:
kubectl apply -f nginx-statefulset.yaml
验证服务部署完成:
kubectl get po
NAME      READY   STATUS    RESTARTS   AGE
nginx-0   1/1     Running   0          5s
- 下载 nginx-ingress.yaml 文件,并执行以下命令以为 NGINX 服务创建一个 Ingress:
kubectl apply -f nginx-ingress.yaml
验证 Ingress 创建成功,并记录下 Ingress 的 ADDRESS:
kubectl get ing
NAME           CLASS   HOSTS               ADDRESS           PORTS   AGE
nginx-server   nginx   nginx.example.com   139.224.120.211   80      2d
- 下载 periodic-client.yaml 文件,将其中的
<nginx-ingress-address>替换为上一步记录的 Ingress 的 ADDRESS,随后执行以下命令创建一个按周期性(以 1 小时为 1 个周期)规律向 NGINX 服务发送请求的客户端 Pod:
kubectl apply -f periodic-client.yaml
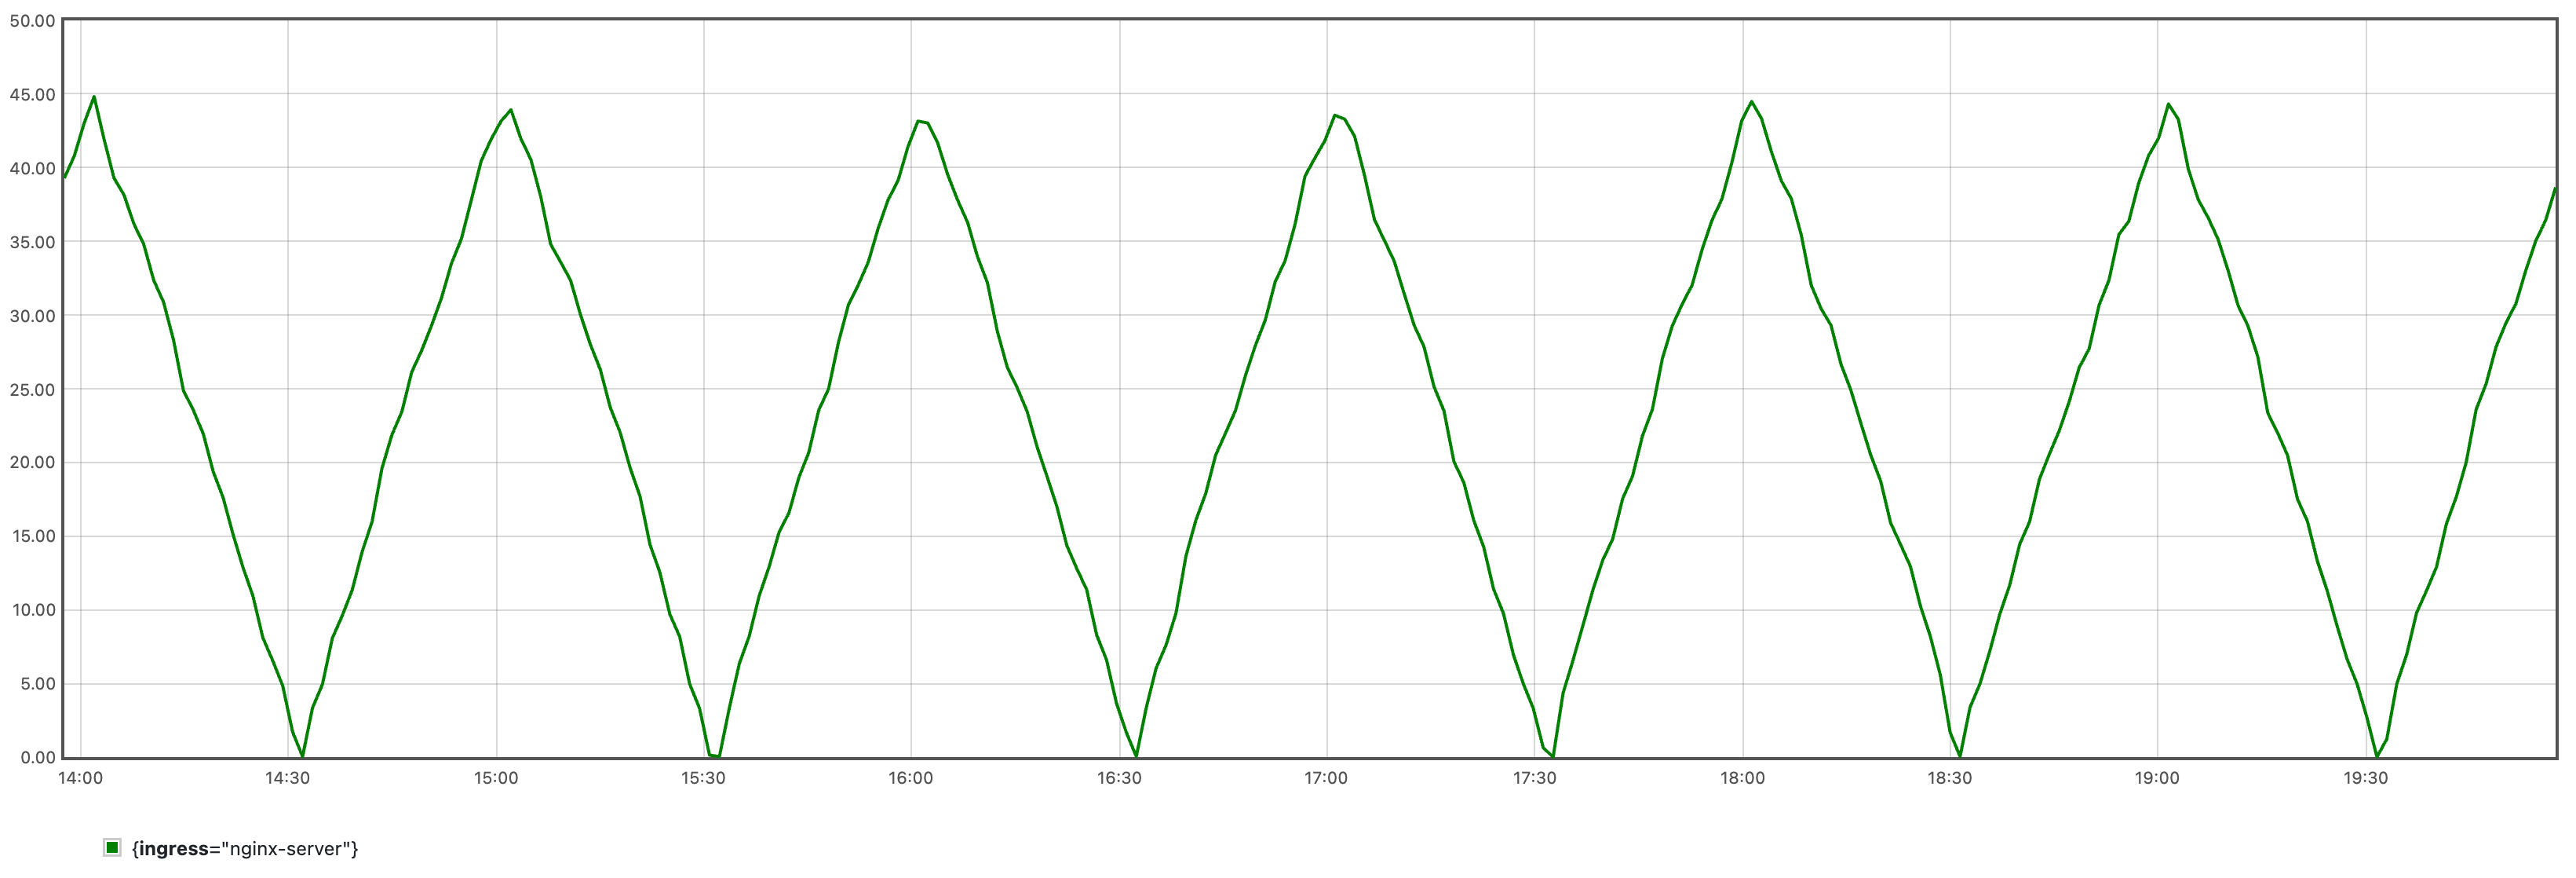
它会产生如下图所示的周期性流量:
由于算法学习需要一定数据量,建议至少运行 24 小时后再进行后续步骤。
训练时序预测模型
请参考用户指南使用该配置完成时序预测模型的训练,随后执行以下命令将模型及其附属文件保存为一个 ConfigMap 供后续算法任务使用,其中的 <model-save-path> 请替换为实际的模型保存目录路径:
kubectl create cm -n kapacity-system example-model --from-file=<model-save-path>
说明
在实际使用中我们可能会得到更大的模型,此时建议将模型文件存储到持久卷而非 ConfigMap。创建配置了动态预测式画像源的 IHPA
下载 dynamic-predictive-portrait-sample.yaml 文件,其内容如下所示:
apiVersion: autoscaling.kapacitystack.io/v1alpha1
kind: IntelligentHorizontalPodAutoscaler
metadata:
  name: predictive-sample
spec:
  scaleTargetRef:
    apiVersion: apps/v1
    kind: StatefulSet
    name: nginx
  minReplicas: 1
  maxReplicas: 10
  portraitProviders:
  - type: Dynamic
    priority: 1
    dynamic:
      portraitType: Predictive
      metrics:
      - type: Resource
        resource:
          name: cpu
          target:
            type: AverageValue
            averageValue: 1m
      - type: Pods
        pods:
          metric:
            name: kube_pod_status_ready
          target:
            type: NA
      - name: qps
        type: Object
        object:
          describedObject:
            apiVersion: networking.k8s.io/v1
            kind: Ingress
            name: nginx-server
          metric:
            name: nginx_ingress_controller_requests_rate
          target:
            type: NA
      algorithm:
        type: ExternalJob
        externalJob:
          job:
            type: CronJob
            cronJob:
              template:
                spec:
                  schedule: "0/30 * * * *"
                  jobTemplate:
                    spec:
                      template:
                        spec:
                          containers:
                          - name: algorithm
                            args:
                            - --tsf-model-path=/opt/kapacity/timeseries/forecasting/model
                            - --re-history-len=24H
                            - --re-time-delta-hours=8
                            - --re-test-dataset-size-in-seconds=3600
                            - --scaling-freq=10min
                            volumeMounts:
                            - name: model
                              mountPath: /opt/kapacity/timeseries/forecasting/model
                              readOnly: true
                          volumes:
                          - name: model
                            configMap:
                              name: example-model
                          restartPolicy: OnFailure
          resultSource:
            type: ConfigMap
请将算法参数 --re-time-delta-hours 的值替换成你所在时区的 UTC 偏移值,如 UTC+8 时区则填写 8,UTC-7 时区则填写 -7。
下面简单解释该 IHPA 的一些配置:
先来看指标,在「基于流量驱动的副本数预测」算法中,我们需要多类指标来共同驱动该算法,因此我们约定了下面的指标配置规范:
- 第一个指标应当配置为该工作负载的目标资源指标,因此类型只能为
Resource或者ContainerResource。它指定了我们期望 IHPA 帮我们维持的目标资源水位。 - 第二个指标应当配置为该工作负载的在线副本数指标,算法会使用该指标查询该工作负载的历史 Ready Pod(即承载流量的 Pod)的数量。该指标的类型只能为
Pods,它会在工作负载维度按照 Pod 名称正则匹配做聚合查询,Kapacity 默认配置了基于 kube-state-metrics 的kube_pod_status_ready指标可供直接使用。需要注意的是,由于该指标仅用于历史查询,我们不需要为它指定目标值,因此这里我们将其target的type写为一个占位符NA。 - 第三个及以后的指标应当配置为和该工作负载的目标资源指标存在正相关的流量指标(如 QPS、RPC 等),算法会对这些指标进行时序预测,随后基于历史资源水位和副本数,给出未来能够满足目标资源水位的预测副本数。这些指标的类型可以是除了
Resource和ContainerResource的任意类型,但注意必须为这些指标设置与训练时设置的相同的name。同样地,这些指标也仅用于历史查询,因此不需要设定目标值。
再来看算法参数,这里简单说明其中几个关键参数的作用,更多信息可参考算法脚本自身的 flags 说明:
--re-history-len:该参数指定了副本数推荐算法学习的历史长度,一般建议至少覆盖应用的两个行为周期。--re-time-delta-hours:该参数指定了应用所在时区的 UTC 偏移值,副本数推荐算法需要感知时区信息以学习时间特征。--re-test-dataset-size-in-seconds:该参数指定了副本数推荐算法学习的测试集大小,默认为一天(86400),只有历史长度不足一天时才需要将其改短,如本示例中设置为一小时(3600)。--scaling-freq:该参数指定了算法最终输出的副本数预测结果的精度,即最终实际扩缩容的最高频率,因此其不能短于时序预测算法的原始预测精度(训练时序预测模型时使用的freq参数)。算法会按照给定的精度对原始预测结果按最大值做重采样后输出,比如如果该参数设置为 1 小时,则算法最终会给出每小时该工作负载所需的最大副本数,最终该工作负载最多每小时进行一次扩缩容。
执行以下命令创建该 IHPA:
kubectl apply -f dynamic-predictive-portrait-sample.yaml
验证结果
- 验证 IHPA 自动创建了运行算法任务的 CronJob,且上一次任务运行成功:
kubectl get cj -n kapacity-system
NAME                                   SCHEDULE       SUSPEND   ACTIVE   LAST SCHEDULE   AGE
default-predictive-sample-predictive   0/30 * * * *   False     1        26m             2d1h
kubectl get job -n kapacity-system
NAME                                            COMPLETIONS   DURATION   AGE
default-predictive-sample-predictive-28286564   1/1           16s        28m
- 验证算法结果成功写入了 IHPA 的预测式水平画像:
kubectl get hp predictive-sample-predictive -o yaml
apiVersion: autoscaling.kapacitystack.io/v1alpha1
kind: HorizontalPortrait
metadata:
  name: predictive-sample-predictive
  namespace: default
  ...
spec:
  ...
status:
  conditions:
  - lastTransitionTime: "2023-10-25T11:00:00Z"
    message: portrait has been successfully generated
    observedGeneration: 1
    reason: SucceededGeneratePortrait
    status: "True"
    type: PortraitGenerated
  portraitData:
    expireTime: "2023-10-25T11:30:00Z"
    timeSeries:
      timeSeries:
      - replicas: 4
        timestamp: 1698231600
      - replicas: 3
        timestamp: 1698232200
      - replicas: 2
        timestamp: 1698232800
    type: TimeSeries
- 验证 IHPA 按算法的预测结果对工作负载的副本数进行调整:
kubectl describe ihpa predictive-sample
...
Events:
  Type     Reason                Age                 From             Message
  ----     ------                ----                ----             -------
  Warning  NoValidPortraitValue  29m (x10 over 85m)  ihpa_controller  no valid portrait value for now
  Normal   UpdateReplicaProfile  25m                 ihpa_controller  update ReplicaProfile with onlineReplcas: 1 -> 4, cutoffReplicas: 0 -> 0, standbyReplicas: 0 -> 0
  Normal   UpdateReplicaProfile  15m                 ihpa_controller  update ReplicaProfile with onlineReplcas: 4 -> 3, cutoffReplicas: 0 -> 0, standbyReplicas: 0 -> 0
  Normal   UpdateReplicaProfile  5m9s                ihpa_controller  update ReplicaProfile with onlineReplcas: 3 -> 2, cutoffReplicas: 0 -> 0, standbyReplicas: 0 -> 0
清理资源
执行以下命令清理所有资源:
kubectl delete -f dynamic-predictive-portrait-sample.yaml
kubectl delete -f periodic-client.yaml
kubectl delete -f nginx-ingress.yaml
kubectl delete -f nginx-statefulset.yaml
1.4 - 使用多阶段灰度扩缩容
准备开始
你需要拥有一个安装了 Kapacity 的 Kubernetes 集群。
运行示例工作负载
下载 nginx-statefulset.yaml 文件,并执行以下命令以运行一个 NGINX 服务:
kubectl apply -f nginx-statefulset.yaml
验证服务部署完成:
kubectl get po
NAME      READY   STATUS    RESTARTS   AGE
nginx-0   1/1     Running   0          5s
创建配置了多阶段灰度缩容的 IHPA
下载 gray-strategy-sample.yaml 文件,其内容如下所示:
apiVersion: autoscaling.kapacitystack.io/v1alpha1
kind: IntelligentHorizontalPodAutoscaler
metadata:
  name: gray-strategy-sample
spec:
  scaleTargetRef:
    apiVersion: apps/v1
    kind: StatefulSet
    name: nginx
  minReplicas: 1
  maxReplicas: 10
  portraitProviders:
  - priority: 1
    static:
      replicas: 1
    type: Static
  - cron:
      crons:
      - name: cron-1
        replicas: 5
        start: 0 * * * *
        end: 10 * * * *
    priority: 2
    type: Cron
  behavior:
    scaleDown:
      grayStrategy:
        grayState: Cutoff         # GrayState is the desired state of pods that in gray stage.
        changeIntervalSeconds: 30 # ChangeIntervalSeconds is the interval time between each gray change.
        changePercent: 50         # ChangePercent is the percentage of the total change of replica numbers which is used to calculate the amount of pods to change in each gray change.
        observationSeconds: 60    # ObservationSeconds is the additional observation time after the gray change reaching 100%.
该 IHPA 配置了以下两个画像源:
- 静态画像源:优先级为 1,副本数始终为 1。
- 定时画像源:优先级为 2,每小时第 0 分钟到第 10 分钟的副本数为 5。
由于定时画像源的优先级高于静态画像源,因此在其生效期间指定的副本数会覆盖静态画像源的副本数。
执行以下命令创建该 IHPA:
kubectl apply -f gray-strategy-sample.yaml
验证结果
在任意小时的第 0~9 分钟,我们可以看到定时画像源生效,工作负载的副本数从 1 扩容到了 5:
kubectl get po -L 'kapacitystack.io/pod-state' -o wide
NAME      READY   STATUS    RESTARTS   AGE   IP          NODE             NOMINATED NODE   READINESS GATES   POD-STATE
nginx-0   1/1     Running   0          50m   10.1.5.52   docker-desktop   <none>           1/1
nginx-1   1/1     Running   0          56s   10.1.5.68   docker-desktop   <none>           1/1
nginx-2   1/1     Running   0          54s   10.1.5.69   docker-desktop   <none>           1/1
nginx-3   1/1     Running   0          52s   10.1.5.70   docker-desktop   <none>           1/1
nginx-4   1/1     Running   0          50s   10.1.5.71   docker-desktop   <none>           1/1
该工作负载对应服务的 Endpoint 数量也变为 5 个:
kubectl get ep nginx
NAME    ENDPOINTS                                            AGE
nginx   10.1.5.52:80,10.1.5.68:80,10.1.5.69:80 + 2 more...   3d3h
在第 10 分钟我们可以看到多阶段灰度缩容开始,其中 2 个 Pod 变为了 Cutoff 状态,并且从服务的 Endpoint 中摘除:
kubectl get po -L 'kapacitystack.io/pod-state' -o wide
NAME      READY   STATUS    RESTARTS   AGE   IP          NODE             NOMINATED NODE   READINESS GATES   POD-STATE
nginx-0   1/1     Running   0          51m   10.1.5.52   docker-desktop   <none>           1/1
nginx-1   1/1     Running   0          63s   10.1.5.68   docker-desktop   <none>           1/1
nginx-2   1/1     Running   0          61s   10.1.5.69   docker-desktop   <none>           1/1
nginx-3   1/1     Running   0          59s   10.1.5.70   docker-desktop   <none>           0/1               Cutoff
nginx-4   1/1     Running   0          57s   10.1.5.71   docker-desktop   <none>           0/1               Cutoff
kubectl get ep nginx
NAME    ENDPOINTS                                AGE
nginx   10.1.5.52:80,10.1.5.68:80,10.1.5.69:80   3d3h
再过 30 秒后,可以看到 4 个 Pod 变为了 Cutoff 状态,并且从服务的 Endpoint 中摘除:
kubectl get po -L 'kapacitystack.io/pod-state' -o wide
NAME      READY   STATUS    RESTARTS   AGE   IP          NODE             NOMINATED NODE   READINESS GATES   POD-STATE
nginx-0   1/1     Running   0          51m   10.1.5.52   docker-desktop   <none>           1/1
nginx-1   1/1     Running   0          96s   10.1.5.68   docker-desktop   <none>           0/1               Cutoff
nginx-2   1/1     Running   0          94s   10.1.5.69   docker-desktop   <none>           0/1               Cutoff
nginx-3   1/1     Running   0          92s   10.1.5.70   docker-desktop   <none>           0/1               Cutoff
nginx-4   1/1     Running   0          90s   10.1.5.71   docker-desktop   <none>           0/1               Cutoff
kubectl get ep nginx
NAME    ENDPOINTS      AGE
nginx   10.1.5.52:80   3d3h
再过 1 分钟后,可以看到工作负载最终被缩容到 1 个 Pod:
kubectl get po -L 'kapacitystack.io/pod-state' -o wide
NAME      READY   STATUS    RESTARTS   AGE    IP          NODE             NOMINATED NODE   READINESS GATES   POD-STATE
nginx-0   1/1     Running   0          52m    10.1.5.52   docker-desktop   <none>           1/1
你也可以通过 IHPA 的事件看到缩容的整个流程:
kubectl describe ihpa gray-strategy-sample
...
Events:
  Type    Reason                Age    From             Message
  ----    ------                ----   ----             -------
  Normal  CreateReplicaProfile  3m53s  ihpa_controller  create ReplicaProfile with onlineReplcas: 1, cutoffReplicas: 0, standbyReplicas: 0
  Normal  UpdateReplicaProfile  2m44s  ihpa_controller  update ReplicaProfile with onlineReplcas: 1 -> 5, cutoffReplicas: 0 -> 0, standbyReplicas: 0 -> 0
  Normal  UpdateReplicaProfile  104s   ihpa_controller  update ReplicaProfile with onlineReplcas: 5 -> 3, cutoffReplicas: 0 -> 2, standbyReplicas: 0 -> 0
  Normal  UpdateReplicaProfile  74s    ihpa_controller  update ReplicaProfile with onlineReplcas: 3 -> 1, cutoffReplicas: 2 -> 4, standbyReplicas: 0 -> 0
  Normal  UpdateReplicaProfile  14s    ihpa_controller  update ReplicaProfile with onlineReplcas: 1 -> 1, cutoffReplicas: 4 -> 0, standbyReplicas: 0 -> 0
清理资源
您可以通过执行以下命令清理样例相关资源
kubectl delete -f gray-strategy-sample.yaml
kubectl delete -f nginx-statefulset.yaml